Showing posts with label corset. Show all posts

Tuesday, October 26, 2010

Sewing a Straight Line

Sometimes we discover techniques that are sure to have been thought of already.  Sometimes we come up wit them ourselves.  In this case, several sources were used together to accomplish this task.

Whilst working on a corset and sewing the stay channels, I lamented that my chalk lines were simply too wide and caused too much variance.  I thought back to the days my mother first taught me to use a sewing machine.  She, after removing the thread and bobbin, had me sew a piece of lined paper to get the hang of the machine.  If I could sew a straight line along the printed lines then I could use thread in the machine.  (Thanks mom!  I still use this method when teaching others to use the sewing machine!)

Then it occured to me that a friend of mine showed me how to spray glue a piece of paper, with the desired design printed on it, to a piece of fabric.  Then sew through the paper and fabric following the printed design. Afterward remove the paper and viola!  More perfect a design you can not find!  (Thanks Lynnette!  I can certainly learn from others, and I am thankful for this idea!)

 
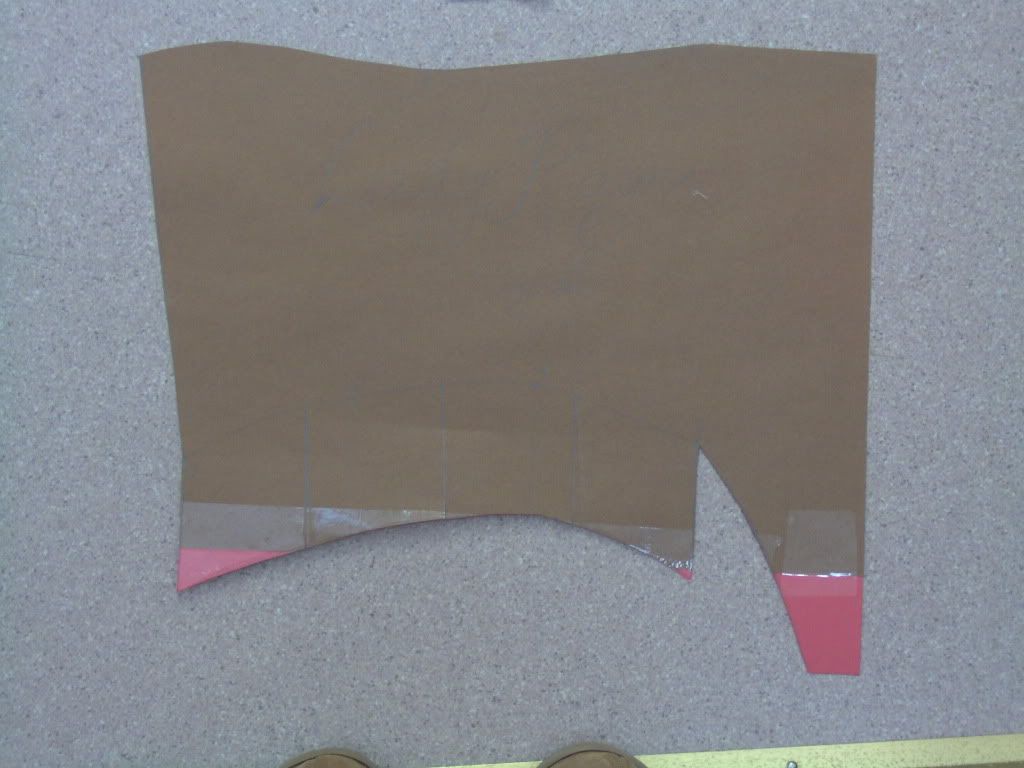
The paper with stay channels glued in place

STEP 1:  I went to the computer and worked out markings slightly larger than 1/2".  I used a "]" at the regular intervals both at the top and bottom of the page (I used landscape for the page options).  Then printed. *

STEP 2: I marked the corset pattern with using the printed guide from step 1.  I then connected the matching lines with a ruler.  ** I had already drafted my corset pattern and cut the fabric, but because this was an afterthought method, the draft was only half.  Now I will draft my corset patterns as full patterns**

STEP 3:  In my bath tub, I placed the fabric pieces, already spray glued together, and then spray glued the top piece of fabric.  Working carefully, I placed the paper pattern on the top-- making sure it lay as perfectly as possible.


Step 4
Sewing through the paper and fabric

STEP 4:  I sewed through the paper and fabric along my lines.

Step 5
Removing the paper--
went to water method
STEP 5: Once all had been sewn, I found that, to protect my stitching, I had to place the whole project into the tub and use water to soften the paper.  Once all paper was removed, I tossed the corset into the washer to clean-up under the stitching.


ALL DONE!  Yea!  I was pleased.  When using my older method , the stay channels weren't as even and straight as I would like.  This new method produces a much more uniform product.

* I use double the stays when I create a corset so the channels need to have enough room to accommodate the depth of two stays.


Warmest Regards,

Enhanced by Zemanta

Sunday, March 14, 2010

Corset Contemplations

Given a choice I choose a boned tabbed corset every time.  I have worn a tab-less corset and the farthingale burn was murder.  The boned tabs create a barrier against drawstring waists.  

I have always made my own corsets and from a variety of materials; so now I have my design preferences down.  I like it to be made from drill/fustian (or even twill if a lighter weight is needed) for the inner shell with sewn channels.  Beyond that I prefer one of two designs: a. a silk shell lining on both the inside and outside-- this is good for those whose doublet might be undone on a hot day. Or b. running a double folded bias tape along the edges.

  
I found the corset generator about three years ago and use it pretty exclusively, though I will experiment with the Dorothea and Elizabethan Effigy corset


I began my corsetry with modern metal grommets that I inserted into the fabric then couched with embroidery floss.  However, I find that I prefer to handwork the lacing holes-- it is just as easy and accomplishes the same thing without the cost of grommets.


In general, I run about 11 channels for steel stays vertically across the front, two channels into each tab and a set on either side of the lacing holes.  And each channel holds two steel stays in the front-- for extra stiffening.


Materials:
1- 1.5yd  of fustian or drill or twill
3 - 4yd   of bias tape or the like
2 - 3      skeins of embroidery floss
1 - 1.5yd of silk or fancy fabric (optional)
approx. 37 steels stays
             thread


Warmest Regards,