Showing posts with label fantasy. Show all posts

Thursday, September 13, 2012

Padme Senate Gown pt6


What did I accomplish: beading the chevrons on the skirt and bodice.
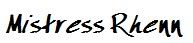
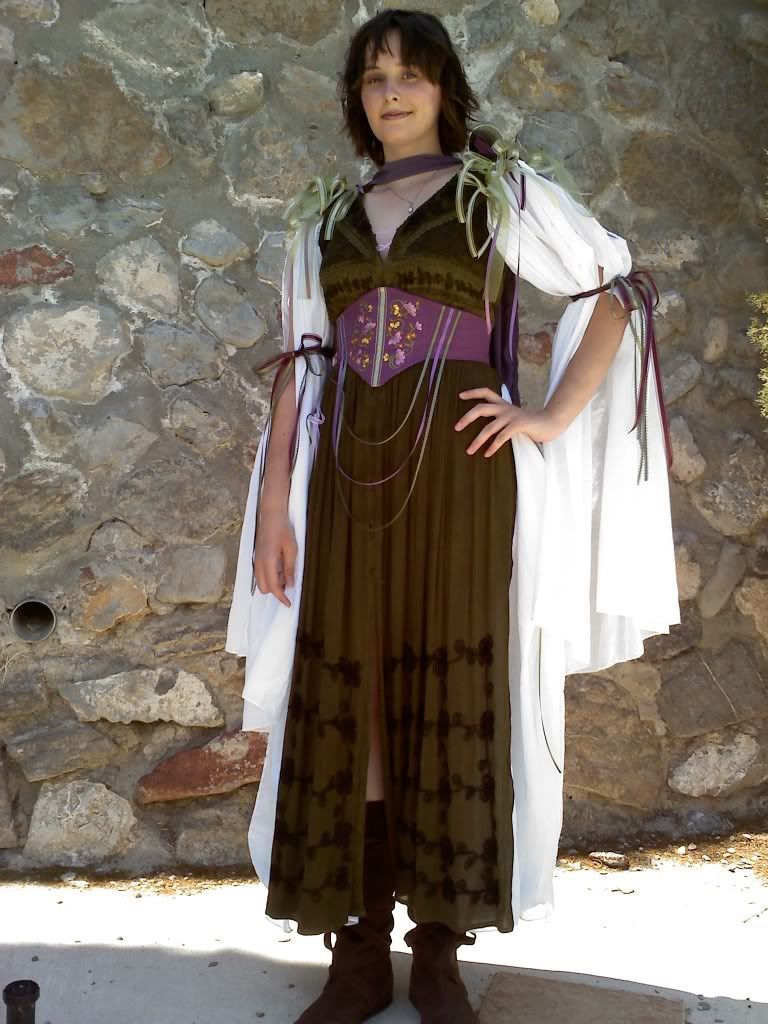
The Chevrons (Original gown Star Wars)

I began the skirt beadwork while my daughter, a thousand miles away, was working on the beadwork at the breast and neckband.   Each night I would knock off at the workshop, head to my bedroom, turn on the TV and sit for another 3 hours to work on the handwork for the skirt (and later the bodice).


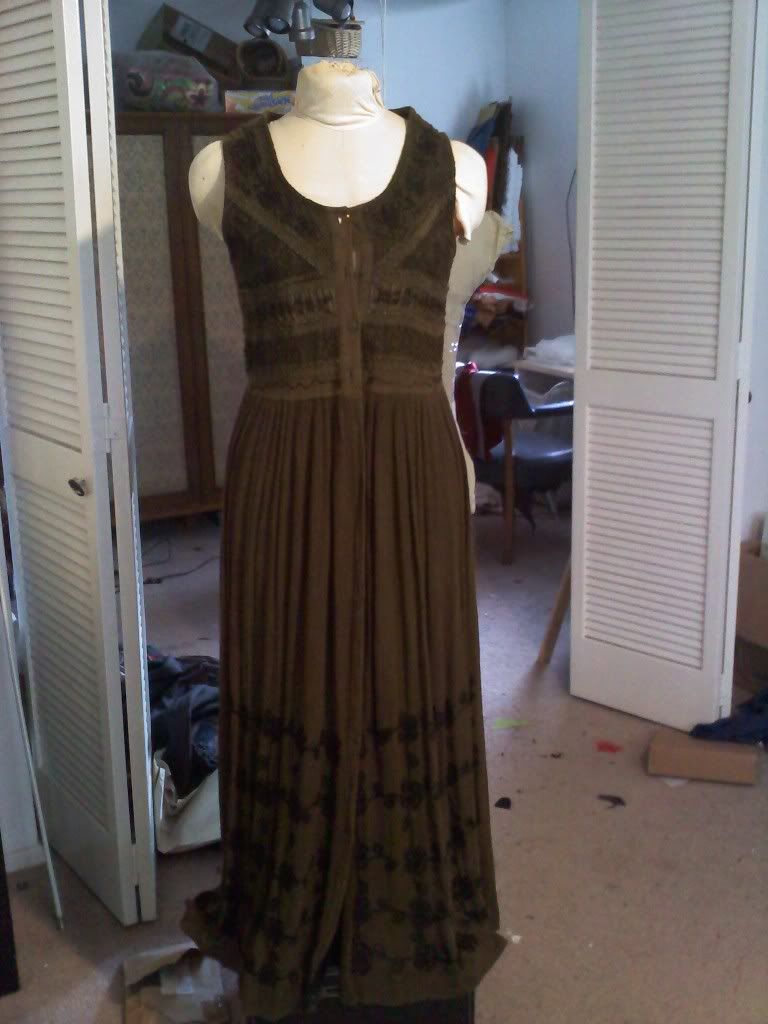
Marked chevron lines on the inner lining
Sewn chevron lines on the outer fabric forepart
Firstly, I figured out that the angle of the chevron was a beautiful 90o.  I marked out the "Vs" on the inner lining in the back ( a stiffer drill/denim fabric).  I figured the bottom V on the skirt was about ⅔from the top, the second was about half that distance, and the top was about half the distance again.** Message me at designs.by.rhenn@gmail.com if you want the exact calculations.**  The bodice was beaded along the waist at the bottom and along the bottom of the beadwork at the breast.  I then split the difference for the middle.  After attaching the inner lining to the main forepart fabric, I sewed along the V lines that I had marked on the inner lining.  This created a nice clean look on the outer fabric for me to use as a guide.

 At first, I tried doing the beadwork as I always do by gathering 4-5 seed beads on my needle and thread, laying them against the line, pushing the needle through the fabric at the end of the 4-5 beads, then coming up from under and securing the middle of the 4-5 bead set.  Then I would move onto the next 4-5 beads.  I didn't like how that lay, because the thread was so fine, the seed beads would drape on it and lay unevenly.

Instead, I purchased a thicker twine, used for making bracelets.  I measured the length needed, with extra for ease of mind sake.  I used fray check on the ends of the twine to keep it from fraying as I beaded hundreds/thousands of beads on it.  (Let that dry hard!)  I tied off the end loosely and worked from the other.  Then I sat for hours stringing the beads.
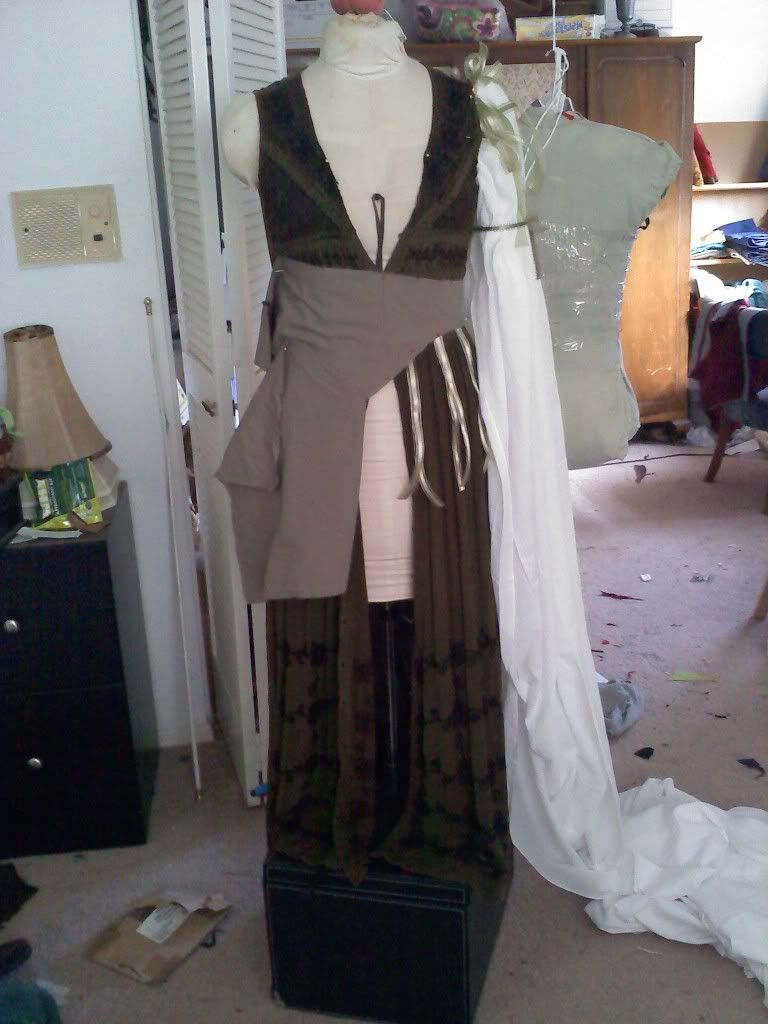
Strung beads being sewn to
 the guiding line


Strung beads demonstrating the
securing  method
After stringing the beads, I tucked the side I had been using to string into the seam at the right place (the end of the chevron) and secured the twine to the seam allowance.  I then laid the strung beads along the line and secured it every 4 beads or so.  I tied off every so often with a knot, just in case the one stitch gave way, my customer wouldn't lose the whole row.  I made sure the beads were just loose enough that when I got to the bottom of the V (the point) I could make a clean angle up the other side.  When I got to the point of the seam, I removed any excess beads (which explains the need for a loose knot earlier) and tucked the twine into the seam and secured it to the seam allowance.
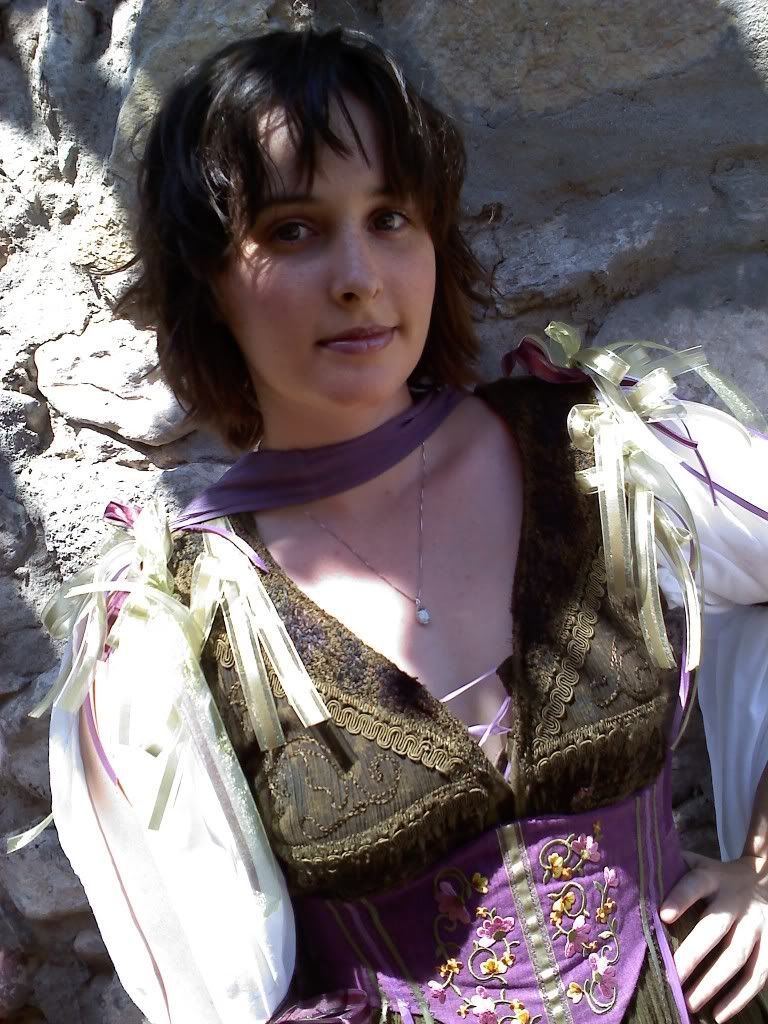
Three beads being strung to create a cluster at the point of
the V
Measured 5/8" from the previous
 cluster to create the new cluster
Completed cluster

Then starting at the point of the V, I brought my needle through the fabric from the bottom to the top and strung 3 beads.  I pushed the needle through the fabric at the same location I came up and drew the beds down, creating the little cluster.  I then measured from that point  ⅝" and repeated the method for creating the cluster.  NOTE!  Tie off each cluster with its own knot (it is not necessary to clip the thread).  That way if one gets caught and breaks away, you don't lose an entire line of clusters.

BE SURE to secure the strung beads every 3-4 beads to keep the line even, and make sure there is enough give among the beads keep them from bunching up on themselves.


Monday, August 6, 2012

Padme Senate Gown part 5

Now to fix the collar to the senate dark gown. Fixed.  LOL!  I ended up back with what I had originally designed.  A tad bit of trimming to clean up the curve (actually sorta straightened it).

And as part of the collar we deal with the embroidered front panels that run down both sides of center front.   The designs are set up as such: 1 single prong (on either side) near the waist, a 2 prong just below, and ten 3 prong that continues to the hem.  The single prong and double prongs are simply the same design as the triple prong with the top and second prongs removed  (top one for the double prong, and the top and middle one for the single prong).

I enlarged the photo and traced the three prong onto a clean piece of paper (window and masking tape method).  Scanned it into the compute and using the basic paint program, removed the top prong for the double prong, corrected the empty space, and saved it to its own file.  Repeated the steps to create the single prong.
I used this one to trace the final pattern out of.


The black and white traces.
Single prong
Double prong
Triple prong

I sent these each to an online digitizer so that they could convert it to the size I needed and the format for my new embroidery machine (.dst).  They sent me a file for each and a jpg of what it should look like when I embroider it out.

Digitized example 
Digitized example
Digitized example

You might notice the difference in their samples-- they were done on different days with different folks.  But that shouldn't  effect the outcome on my machine.  My machine allows me to flip the image horizontally which I will do to complete the left side (while worn) of the lapel band.


Friday, August 3, 2012

Padme Senate Gown part 4

After farming the bead work out to my daughter (see post ) I sat on my laurels.  Not because I was lazy, but because if I begin and don't have a clear course of action I may not be able to correct the path.  So I lamented and considered and discarded idea after idea: how was I going to solve the embroidery down the front.  Originally I had hoped to have a couple of months however, as I stated before, the fabric was very hard to come by.  This left me panicked.  I finally broke down and purchased an inexpensive embroidery machine (made sure it could hook up to my comp--I know, usb drive would be best, but I have no problem hooking up my comp to the God send).  But I couldn't get the software to produce customized embroidery options.  So I did an internet search for a digitizing company that could turn the digitized format file over pretty quickly.  I found 24hourdigitizing.com.  I had already determined how large I needed each embroidered piece to be (calculated the length of the waist to the hem and divided by 13).  I had taped a print out of the picture to the window, traced a clean black and white copy, and scanned the image.  So I sent the jpg to the company, they sent back a quote, I said "OK!" ($15, not bad and i can keep it forever).  They got me the final file back (in the format for my machine) with in about 6more hours.  I plugged it into the machine and gave it a go.  Perfect!  Right size and everything.

The next day, I sent the other two designs off to them (that is today the 3rd of August) and I am waiting for them to come back.  Now onto the construction of the surcoat.

I started by sewing the body of the surcoat (bodice) portion.  Easy enough.  Sew the back to the front at the shoulders and under the arm (side).

Then I went to the collar.  The collar however, was not laying as I liked.  So to alleviate frustration, I am going to cover some of the skirt prep.

The velvet is a frustrating fabric--a rose with thorn.  So I kept the selvage and turned it under about 1 1/2"-- by sight, no ironing, no pressing--and I then hand stitched the hem in place making sure to only snag a few strands of the underside of the fabric so that it hopefully will not show on the outside when the gown is worn.
Hand stitched hem

Hopefully the hem stitches don't show too much
I hem the bottom first because of the next step-- a trick I learned from the Tudor Tailor.  I tie the skirt to the dress dummy at the waist.  I adjust the gathers and such, pulling up the waist until the hem lies where I need it to, whether to the floor or such as I have ascertained.  (On my own projects I adjust my dress mummy to my height at the shoulders so that I know the hem can fall to the floor.)
Rope/cord at the place I wish for the waist to be.
Gathers adjust to the approximatly placing they
will fall when the skirt is cartridge pleated later.

The front part of the surcoat skirt will lay flat on either
side of the center front about 4" so I adjust the gathers
to reflect the front flat.


The skirt of the surcoat needs to fall just below the
hem of the underskirt, due to the color of the
underskirt.  It might be good idea to shorten the hem
of the underskirt by about an inch to accommodate
this.
Use the marking tool to mark waist
You may notice that the back of the gown has less excess at the waist, this is one reason why we take the next step.  Now we use chalk to mark the waist.  Once the skirt is removed from the dress mummy and you lay it out on your flat surface, you will notice the chalk mark reflects the slight slope downward in the front.


Step 1a

1a.  Before we lay the skirt on the flat surface, fold the gown in half, matching center front to center front.  Be sure the hem is even with itself.


2a.  Lay the garment on the floor smoothed out.  

3a.  Use a large straight edge, ie yard stick, plank of wood, what-have-you, to straighten and even the straight aways.

4a. Use your eye to even out the curve down the center front. 

5a. NOW: using a ruler or 1/2" stay or such guide, draw another line above the first.  You are creating your 1/2" seam allowance.  CORRECTION:  Add 1" to the top--the method I use to attach the skirt uses 1/2".  So you need to add 1/2" for seam allowance and another 1/2" for the attaching method = 1".

6a.  Carefully cut through both layers of fabric following the second line you drew. 

NOTE to CONSIDER: some of us don't have even leg lengths, uneven hips, or what have you. 

    • The previous steps might need to be altered in that the fabric should be marked on the dress dummy
    •  then the fabric laid out fully on the flat surface.  
    • Then using the chalk markings you made, smooth them out and then mark your 1/2" seam allowance.  
    • Cut at this new mark along the entire waist line.  
    • Proceed to the next steps.  (except folding in half)
7a. fold your lining fabric in half, keeping your selvage edges lined up.  I am using the selvage as my finished hem.  If you choose not to do this, then finish the hem as you wish before proceeding.


8a.  Smooth the fabric and then lay the skirt you have already cut on top, matching the hems and center back (fold).  Now move the over skirt down past the lining so that the hem of the lining is about 1" shorter than the overskirt.


9a.  Trim the front straight edge of the lining if needs be.

10a  Using a fabric marking tool, trace the waist line of the over skirt to the lining below.


11a.  Cut the lining.
12a.  I find cotton velvet frustrating to deal with.  Polyester velvet more so.  While attempting to sew the lining to the velvet at the waist, it shifted with no mercy shown to me.  So I adhered the two together with fabric glue applied within the seam allowance at the waist.  Once dried I sewed them together along the waist.  (That worked.)

I am moving onto to fixing this collar.  The skirt has to wait until the under lining of the collar and forefacing have been attached to the bodice.  So I will move onto fixing the collar.  Ugh.


Warmest Regards,

Thursday, February 24, 2011

The Plans for the "ZEMA" Upcycle .

Recently I visited the second hand store and found a leather jacket, sheath dresswith vest, and a home decor item that I thought would make a very earthy faerie up-cycle garment.  Below you will find the plans.  The items that crossed out were plans that I found to be unneeded or that I changed my mind as I went along.  If the line description is in green it was an idea added as I went along.


  • Steps for the DRESS:
  • Second hand sheath & vest
    • remove the embroidered elephant pocket. 
    • remove the buttons from the bottom front.
    • make an inverted pleat beneath each breast
    • cut a deeper "V" into the front center neck
    • add a standing collar to dress neckline
    • create and add lacing loops to the "V" in the center front neck
    • (2/23/11) Where the elephant was is a shaded area, this I will attach leather to to create a nice edging for the collar
    • cut the sleeves of dress with a "V" into the center cap;cut from the sleeve of the dress to create a "V" fall.
    • split the dress seam all the way up the sides to the waist.
    • add cotton/linen to the sides (similar to the Heather dress)
    • maybe curl the edges of the sides (create a seam up the front and back) and the front and back, back on itself
    • use the buttons on the back as decoration
    • find buttons to create a decoration on the sides and front as well.
    • sew a "V" on the back neckline down the center of the back about 6-8 in.
    • create a waist cyncher that is permanantly attached to dress; laces on the sides
    • maybe use the lace from the triangle fabric or trims to adorn the cyncher.
    • A new note (2/23/11): I saw something that inspired me to add a new detail.  This will be faux hood and sleeves-- ethereal feel.  The Heather design had sleeves similar to those I will utilize for the Zema.

  • Steps for the dress SLEEVES:
  • home decor item with lace
    • add linen or cotton to the sleeves-- billowy
    • see if there is enough either of the dress jacket or of cotton/linen to create a fall of fabric at the wrist that falls
    • gracefully from the under the jacket.
    • using the dress vest make cloth bracer cuffs to attach to the wrist of the sleeve linen/cotton
    • decorate the wrist bracers like the cyncher


  • Steps for the JACKET:
  • leather jacket
    • will add two more sets of grommets in front of jacket to create a "cyncher"
    • split the side seams of the jacket
    • turn the collar of the jacket lapel under and stitch down.
    • flip the collar of the jacket to create a standing collar.


Finished Product
The "Zema" went live last week and here are the steps I took to completion.

I had a change of idea--Inspiration!  I decided that I wanted to make a line of Steampunk Elven Designs.  So the Zema became just such.

I did no use the leather jacket-- this was one of those times where going with the flow instead of forcing my will turned out a great product.


The neck line with the wool applique
and gears.

Drape seen from behind, falls of linen
at hem. The sleeves seen hanging.
Gear and watch parts applications.
  • I cut the neckline down, as with the "Heather" Upcycle.  The problem I faced with the Zema was that the pocket seen on the original dress left a shadow on the breast.  To cover this, I made a wool applique.  
  • I added  a drape made of linen at the neck line. It is edged in brown satin ribbon.
  • The sleeves were made of linen as well and are long.  They can be left hanging free or worn attached at the wrist.
  • The wrist cuff is made from the cut away sleeves on the original dress.
  • I assembled various different gears and watch parts to create different areas of conversation: the apex of each linen spring at the hem, along the curves of the wool applique, and at the wrists I used gears to button the band closed.
  • The waist cincher and front view of
    the gown.
  • A classy touch is seen in the waist cincher.  It is made from scraps of leather that is to be used with my Hattie doublet later on.  I used two belts found at a second hand store.
  • The falls of linen at the back can be worn down to trail gracefully behind or can be hooked up on the gears at the back to keep it out of the dirt and mud.
  • All the falls at the hem were overlocked with a dark brown thread.


Rear fall seen
trailing behind.
Rear fall seen
attached to the
gears.


Tuesday, October 26, 2010

Sewing a Straight Line

Sometimes we discover techniques that are sure to have been thought of already.  Sometimes we come up wit them ourselves.  In this case, several sources were used together to accomplish this task.

Whilst working on a corset and sewing the stay channels, I lamented that my chalk lines were simply too wide and caused too much variance.  I thought back to the days my mother first taught me to use a sewing machine.  She, after removing the thread and bobbin, had me sew a piece of lined paper to get the hang of the machine.  If I could sew a straight line along the printed lines then I could use thread in the machine.  (Thanks mom!  I still use this method when teaching others to use the sewing machine!)

Then it occured to me that a friend of mine showed me how to spray glue a piece of paper, with the desired design printed on it, to a piece of fabric.  Then sew through the paper and fabric following the printed design. Afterward remove the paper and viola!  More perfect a design you can not find!  (Thanks Lynnette!  I can certainly learn from others, and I am thankful for this idea!)

 
The paper with stay channels glued in place

STEP 1:  I went to the computer and worked out markings slightly larger than 1/2".  I used a "]" at the regular intervals both at the top and bottom of the page (I used landscape for the page options).  Then printed. *

STEP 2: I marked the corset pattern with using the printed guide from step 1.  I then connected the matching lines with a ruler.  ** I had already drafted my corset pattern and cut the fabric, but because this was an afterthought method, the draft was only half.  Now I will draft my corset patterns as full patterns**

STEP 3:  In my bath tub, I placed the fabric pieces, already spray glued together, and then spray glued the top piece of fabric.  Working carefully, I placed the paper pattern on the top-- making sure it lay as perfectly as possible.


Step 4
Sewing through the paper and fabric

STEP 4:  I sewed through the paper and fabric along my lines.

Step 5
Removing the paper--
went to water method
STEP 5: Once all had been sewn, I found that, to protect my stitching, I had to place the whole project into the tub and use water to soften the paper.  Once all paper was removed, I tossed the corset into the washer to clean-up under the stitching.


ALL DONE!  Yea!  I was pleased.  When using my older method , the stay channels weren't as even and straight as I would like.  This new method produces a much more uniform product.

* I use double the stays when I create a corset so the channels need to have enough room to accommodate the depth of two stays.


Warmest Regards,

Enhanced by Zemanta

Monday, July 19, 2010

Up-cycling from Second Hand to Fantasy Glam

I was introduced to up-cycling in a round about way.  So roundabout, I can't even remember all the twists and turns.  But it hit me recently that I should consider the option to optimize and expand my customer base (right now via Etsy).

I purchased two dresses from Goodwill, one embroidered green buttoned down sheath and a purple silk sheath.  The green is a M(edium) and the purple is a size 4.
Size Medium 
Size 4


I started with the green.  Put it on the dress dummy and sliced up the side seams, popped all the buttons but two, and turned down the neckline to create a better view of the cleavage.  I then pinned in the ribbons at the shoulder (needed more-- purple) and pinned in a white gauzy cotton for sleeves.
The fabric around the waist is a mock-up for the waist cincher.
***
Finished product and notes:


(click for larger view)


(click for larger view)
The transformation: Added cotton gauze to the sleeves and at the side seams of the green dress.  Ribbons at the shoulder and at the bicep of the arm of various colors.  Removal of the original ties in the back and cut and re applied to the front as loop holes for lacing.  A redesign of the neckline to allow for a deeper scoop.


(click for larger view)
The Partial cape : cut up both side seams of the purple sheath dress.  Hung sideways from the neck to cover the arms or hang from the back.


The waist cincher was made from purchased linen/cotton blend and appliqués and lacing grommets added.

I guess that covers it, LOL!

Warmest Regards,

Enhanced by Zemanta