The next day, I sent the other two designs off to them (that is today the 3rd of August) and I am waiting for them to come back. Now onto the construction of the surcoat.
I started by sewing the body of the surcoat (bodice) portion. Easy enough. Sew the back to the front at the shoulders and under the arm (side).
Then I went to the collar. The collar however, was not laying as I liked. So to alleviate frustration, I am going to cover some of the skirt prep.
The velvet is a frustrating fabric--a rose with thorn. So I kept the selvage and turned it under about 1 1/2"-- by sight, no ironing, no pressing--and I then hand stitched the hem in place making sure to only snag a few strands of the underside of the fabric so that it hopefully will not show on the outside when the gown is worn.
 |
| Hand stitched hem |
 |
| Hopefully the hem stitches don't show too much |
 |
| Rope/cord at the place I wish for the waist to be. Gathers adjust to the approximatly placing they will fall when the skirt is cartridge pleated later. |
 |
| The front part of the surcoat skirt will lay flat on either side of the center front about 4" so I adjust the gathers to reflect the front flat. |
 |
| Use the marking tool to mark waist |
 |
| Step 1a |
1a. Before we lay the skirt on the flat surface, fold the gown in half, matching center front to center front. Be sure the hem is even with itself.
2a. Lay the garment on the floor smoothed out.
3a. Use a large straight edge, ie yard stick, plank of wood, what-have-you, to straighten and even the straight aways.
4a. Use your eye to even out the curve down the center front.
5a. NOW: using a ruler or 1/2" stay or such guide, draw another line above the first. You are creating your 1/2" seam allowance. CORRECTION: Add 1" to the top--the method I use to attach the skirt uses 1/2". So you need to add 1/2" for seam allowance and another 1/2" for the attaching method = 1".
6a. Carefully cut through both layers of fabric following the second line you drew.
NOTE to CONSIDER: some of us don't have even leg lengths, uneven hips, or what have you.
- The previous steps might need to be altered in that the fabric should be marked on the dress dummy
- then the fabric laid out fully on the flat surface.
- Then using the chalk markings you made, smooth them out and then mark your 1/2" seam allowance.
- Cut at this new mark along the entire waist line.
- Proceed to the next steps. (except folding in half)
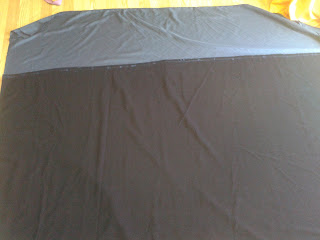
8a. Smooth the fabric and then lay the skirt you have already cut on top, matching the hems and center back (fold). Now move the over skirt down past the lining so that the hem of the lining is about 1" shorter than the overskirt.
9a. Trim the front straight edge of the lining if needs be.
10a Using a fabric marking tool, trace the waist line of the over skirt to the lining below.
11a. Cut the lining.
12a. I find cotton velvet frustrating to deal with. Polyester velvet more so. While attempting to sew the lining to the velvet at the waist, it shifted with no mercy shown to me. So I adhered the two together with fabric glue applied within the seam allowance at the waist. Once dried I sewed them together along the waist. (That worked.)
I am moving onto to fixing this collar. The skirt has to wait until the under lining of the collar and forefacing have been attached to the bodice. So I will move onto fixing the collar. Ugh.
Warmest Regards,


No comments:
Post a Comment