I have one hip that is rotated forward which results in one shoulder riding lower than the other. A regular pattern and regular dress dummy make it difficult to customize to myself. So inspiration hit (God usually knocks me over the head) and I thought: "What if I used duct tape and wrapped my body with it then stuffed it?" So my very first dress dummy was made 13years ago and worked wonderfully. However, duct tape is NOT a good idea-- it gums up your pins.
What I have used in the past is a long torso, long sleeved turtleneck knit shirt. What I prefer is a T-shirt weight knit dress so that I can be mummified as low on the hips as needed (this allows for the farthingale or hoopskirt to stay in place while you work on the project). And I have found that clear packing tape, the cheap stuff is fine, is the best for getting mummified.
Materials:
turtleneck or other disposable knit item (this will be cut)
clear packing tape
stuffing (lots and lots of it)
hanger (optional)
twine or clothesline rope (optional)
sturdy bike hook (optional)
Step 1:
Have someone use some painters tape or masking tape to mark your natural waistline, where your shoulders end, your neck bottom, top of breasts and, if you like, the bottom of the breasts. You can also mark the center front and center back or any other marking you particularly like to have.
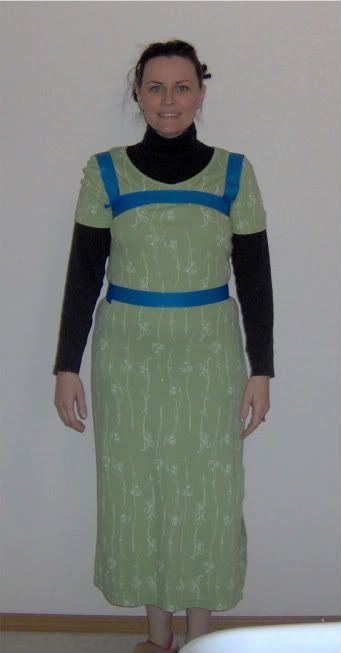
Step 2:
Now the mummifying begins. I find that putting some vertical strips of tape first to help the fabric keep from twisting too much is helpful. Begin wrapping the body all the way around, and remember to wrap counter direction to keep from getting twisted as well. I wrap from the neck to the hip line.
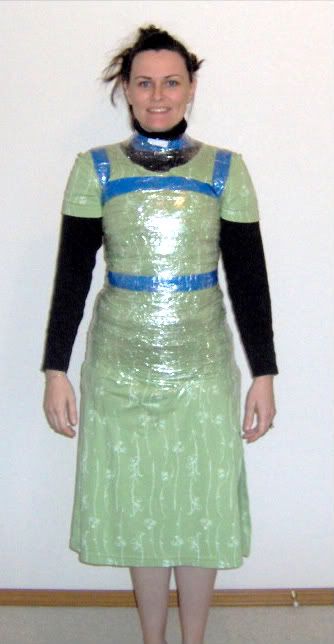
Step 3:
Once you are satisfied that the mummy shell should stay intact once it has been shucked, have your buddy run a pair of scissors up your back along your spine, cutting the turtleneck/dress as well.
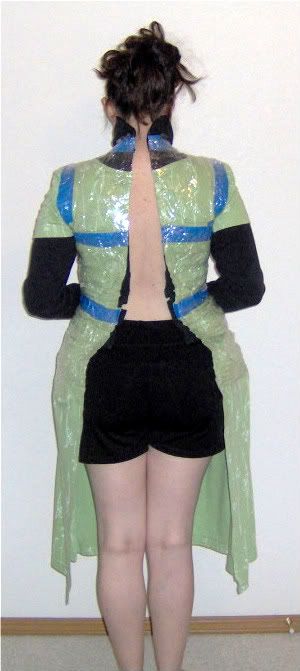
Step 4:
Once the shell is shucked, you can re-tape the center back seam and then stuff with whatever you have on hand. I've used sewing cabbage* from hell*, old sheets, pillows, old clothing, anything soft.
Variations:
I have used two methods for securing the dress dummy in an upright position. The first was to insert a sturdy slightly curved hanger as I was stuffing the dummy so that I could suspend it from a hook on the ceiling. The second was to level off the bottom with a tightly packed stuffing and tape to sit on a pedestal (I actually use a vertical wrapping paper Rubbermaide container). The first was the best as I could adjust the dummy to my height, matching shoulders, so that I could get a perfect hem on my skirt, too.
IDEA #2 (Updated May 2010):
I can and do draft my own patterns on grid paper. However I think I want something even more exact, but my clients are not always next door to me or even in the same 60mile radius. So I am working out the following idea for dress dummies:
Materials needed:
IDEA #2 (Updated May 2010):
I can and do draft my own patterns on grid paper. However I think I want something even more exact, but my clients are not always next door to me or even in the same 60mile radius. So I am working out the following idea for dress dummies:
Materials needed:
- Fabric any kind-- cheaper better (I used a sheet from Goodwill)-- 2 yrds or more
- velcro -- I used self adhesive (since this is an experiment)
- safety pins
- Measuring tape
- marker of some sort
- adjustable rings (found in the home fix-it shops in the heating and air sections)
- Stuffing-- I used pillows and cabbage from old sewing projects.
As I am not sure how practical a one-size-fits-all application would work for this, I am going to make this using a women's size 12-14 measurements. It is my desire however to get it to work for one size fits all.-- eventually.
Ok I cut the fabric approximately by 25" wide. Length should be about yard (or more if you wish).
Ok I cut the fabric approximately by 25" wide. Length should be about yard (or more if you wish).
I applied the rough side of the velcro (hook side) vertically along both sides of the front piece.
OK! OK! OK! New plan! I took an old sheet and ripped it in half. I then marked down the center of each, one for the front and one for the back. Starting at the top, I use the neck to waist measurement, mark that. Then mark the waist side to waist side; then measure up the distance of the armpit to waist at each end. I then mark the shoulder breadth at the top. I measure from the belly button (natural waist) to the outside of the shoulder on each side. I mark the chest side to chest side. Repeat what needs to be repeated on the back piece.
THen I saftey pin at the appropriate places, matching what needs to be matched. I turn it inside out and insert a plastic bag. Then I stuff with cabbage from hell until filled! It give the most basic shape for your subject without having to mummify them.
Warmest Regards,


No comments:
Post a Comment